Connecting Azure with Vistar
Connecting Vistar and Azure
To establish a connection between Vistar and Azure, follow the steps below:
- Navigate to the Integrations page.
- Look for the Available section.
- Search for Azure within the available integrations.
- Click on the Connect option for Azure.
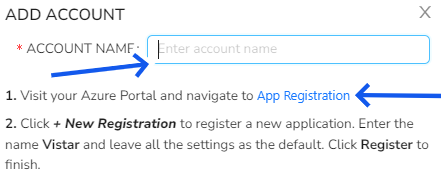
- Visit your Azure portal for App Registration
-
To access Azure Active Directory, you can click on the option for App Registration.
-
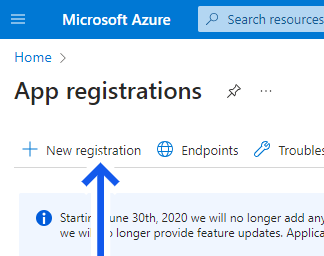
To begin the process, click on the +new Registration button to register a new application named Vistar.
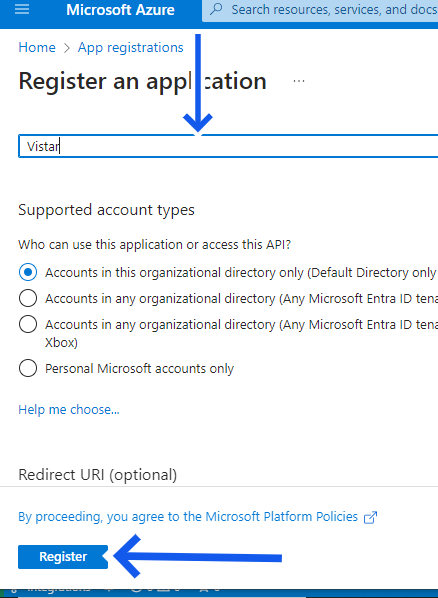
- Enter the name Vistar and leave all the settings as the default. Click Register to finish.
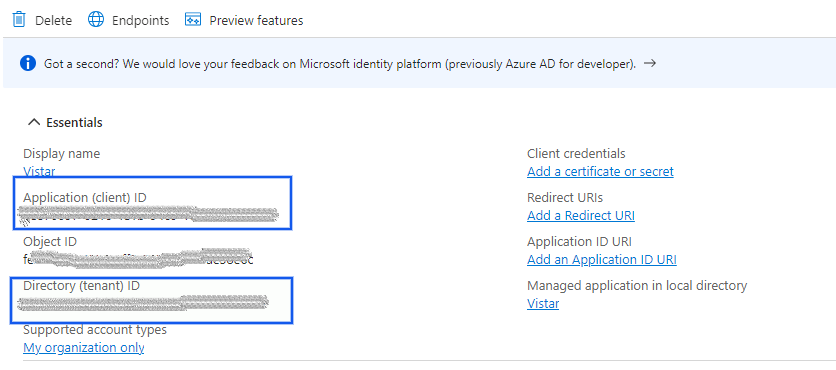
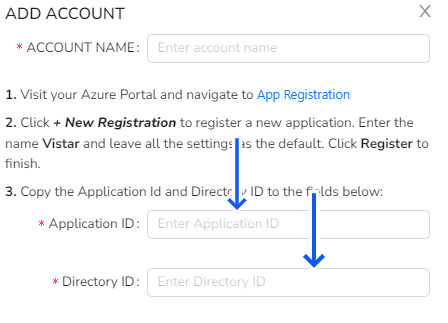
 2. Copy the Application Id and Directory ID to the field
- Retrieve the Application ID and Directory ID from Azure, and then enter these values into the corresponding fields in Vistar.
- Add Client Secret ID
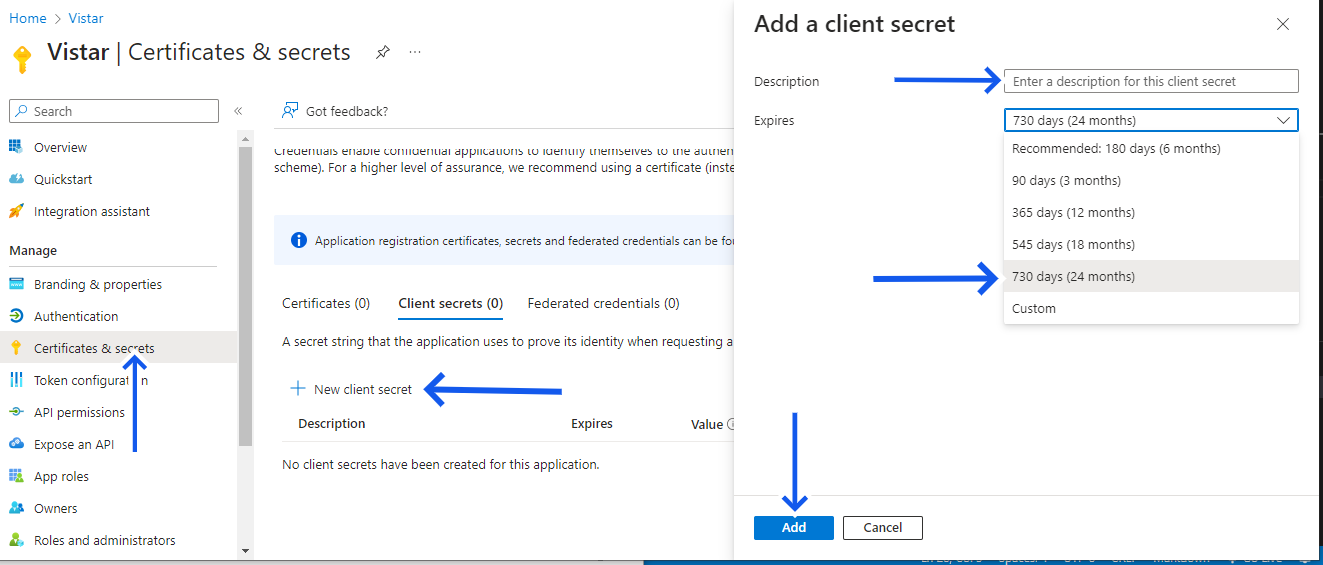
- The next step is to add the client secret in Azure by navigating to the Certificates & secrets section and Click on the +New Client Secret .
- In the Description field, enter the name Vistar and select 24 Months as the expiration duration.
- Finally, click on the Add button to complete the process.
 4. Copy secret value from Azure
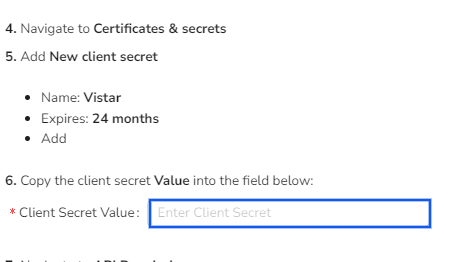
- Retrieve the secret value from Azure and enter it into the appropriate fields in Vistar.

 5. Api Permission
-
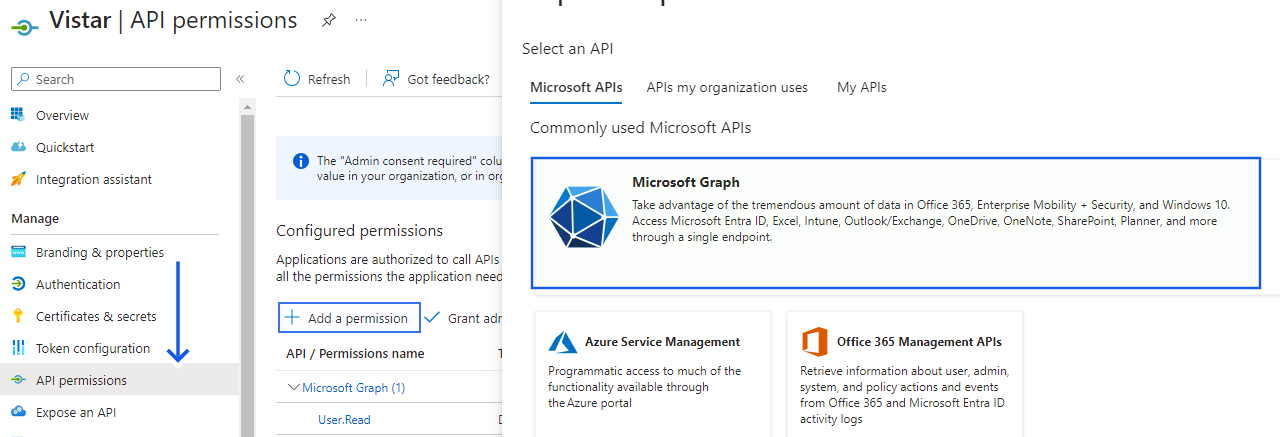
Navigate to API Permissions
-
Click on _Add a Permission
-
Select Microsoft Graph
-
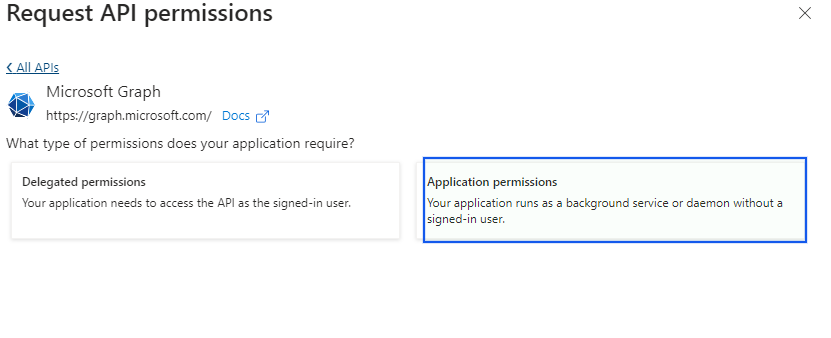
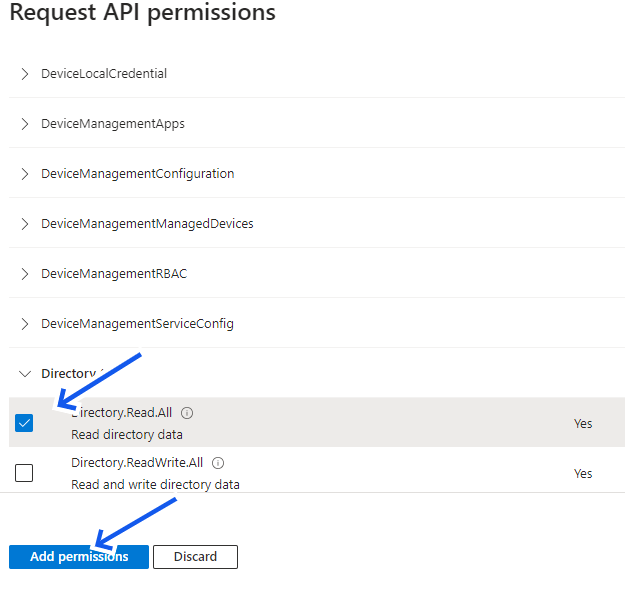
Select Application Permissions

-
Check Directory.Read.All permission
-
Click Add permissions
 6. Grant Admin Consent
- Click Grant admin consent, and click Yes when prompted to grant requested permissions.
- Subscriptions
- Navigate to Subscriptions in Azure.
- Copy the Subscription ID and paste in the 'Subscription ID' field in Vistar.
- Click on continue.
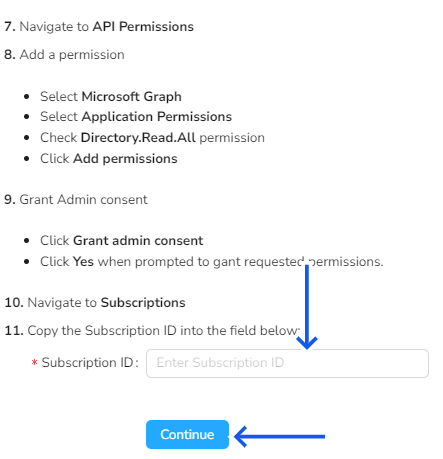
- The Azure Integration is now complete! The integration will now load in all your resources.
Connect multiple Azure Subscriptions to Vistar
To add multiple Azure subsciption to vistar you need to repeat the above process for any other unconnected subscriptions you would like to connect to vistar.